Packing the S&S coupler touring bike requires a fair bit of disassembly. Below is the list of tools that I need for disassembly and reassembly
TOOLS
S&S coupler wrench (cannot forget this!)
hex wrenches 2, 3, 4, 5, 6, 8 mm
-- 2 is for the shift/brake line couplers and derailleur adjustment
-- 3 is for the shift stop on the downtube
-- 4 is for most braze-ons and many adjustments
-- 5 is for crank and head set
-- 6 is for the angle adjustment on my Ritchie stem
-- 8 is for Shimano XT pedals
special hex-like wrenches
-- anti-theft axles
-- brake torx wrench
nut drivers 8, 10 mm
-- these make it easier to install Velo-Orange fenders
open/box end wrenches 8, 10 mm
-- 8 mm is required for installing Tubus Cosmo rack.
-- 8, 10 are for Velo-Orange fenders (this is a back-up for nut driver).
adjustable end wrench (e.g. Crescent wrench) with 1" opening
-- used for cassette and disc brake rotor lock nut tool
chain whip (for removing cassette when re-packing)
needle-nose pliers
bent-nose pick for pulling brake retaining clip out
-- the retaining clip on Avid BB7 brakes can be difficult to remove, so you need some kind of thin bent wire to pull it out.
cassette and disc brake rotor lock nut tool
tire removal tools
air pump
EXTRA TOOLS
knife
wire cutter
tire stem removal tool
masking tape (for holding things together in re-packing)
electrical tape
chain removal tool (mine is on a Crank Bros.multi-tool)
spoke wrench
Shimano bottom bracket plastic protector (not full wrench)
SPARE PARTS
8 spokes with nipples
8, 10 mm hex nuts and washers (easy to lose)
extra braze-on bolts
4 chain links and replacement pieces.
Saturday, April 23, 2016
Packing an S&S coupler touring bike
Packing a touring bike into an S&S coupler bag is a bit of a puzzle. It took me 4 tries to get a good system. The biggest problem for me was the rear rack, which cuts into space that would otherwise be available for the cassette and axles of the wheels.
I bought 4 lengths of pipe insulation foam (for 1" pipe) and used that to wrap everything.
Key breakdown items:
-- disc brake rotors must be removed from wheels
-- removing the cassette can make it easier to fit (necessary in my case)
-- butterfly-style handle bars have to be removed from the stem
-- seat removed from seat post
-- one crank needs to be removed and turned to face the same direction, then taped with the other crank along the frame chainstay
-- rear derailleur must be removed
-- tires removed from rims (maybe not for every bike, but needed for me). Note that if you don't remove your tires, you still need to deflate
Here's a step by step in pictures:
I've put a piece of cardboard in the bottom to give it a little more structure.

The rear part of the frame is the biggest piece, Note the cranks are taped back only the chainstays and the derailleur is in a plastic bag and taped between the chainstays.

The chainstays go along one side of the frame, to give the greatest space in the center for the rims.

This rack (Tubus Cosmo) is nice, but the width at axle is a space killer.

Note the rack is tucked in so that its thickest part (at the axle) is back in the same corner as the axle of the frame. The rack (with rims, as we shall see) will determines the overall thickness of the packing in the case.

Here's the front part of the frame

Tuck this one under the frame, but make sure you don't make the rack raise up!

The fork and my saddle bag:

The saddle bag gets tossed in the corner,

And the fork gets set along the edge of the frame. Note that the saddle bag here helps keep the brakes on the fork away from the edge of the case (but this probably isn't really important).

Butterfly handlebars are a pain. I tried to pack them with the stem on, but couldn't make it work.

Here the handlebars sit upright against the side that is opposite the fork.

Now we can throw in some miscellaneous pieces. Here's my seat post and the chain whip (which you need to remove the cassette in re-packing)

More miscellaneous pieces: seat, brake rotors, cassette, tools, tape, stem, etc. This is the time to throw in all the extra junk.

Once this stuff is in, it's starting to look full.

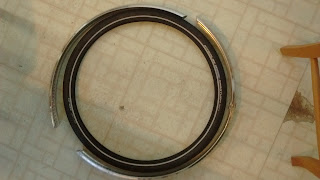
Next a tire...

... and a rim (start with the rear)

Here the spindle for the cassette is down, so it is inside the rack below.

Another tire and the fenders. Note that the stays for the fenders were removed and are part of the miscellaneous stuff above.
Here's the additional tire and fenders

And we add the final rim on top.

Then a layer of cardboard.

It all looks really nice - but be warned its a struggle getting it zipped! This doesn't mean that you've necessarily overpacked. When you put in the plastic side protectors and hook the up with velcro, then the zipping (even when empty) requires you to stretch the fabric. It's a good thing it has 8 extra buckles around to hold it together in case of zipper failure.

Basic bike and tools above came in at 48 lbs (which is under the limit of most airlines). I wanted to add my panniers stuffed in some of the blank space, but it put me right on the line and I don't want the extra weight charge.
I bought 4 lengths of pipe insulation foam (for 1" pipe) and used that to wrap everything.
Key breakdown items:
-- disc brake rotors must be removed from wheels
-- removing the cassette can make it easier to fit (necessary in my case)
-- butterfly-style handle bars have to be removed from the stem
-- seat removed from seat post
-- one crank needs to be removed and turned to face the same direction, then taped with the other crank along the frame chainstay
-- rear derailleur must be removed
-- tires removed from rims (maybe not for every bike, but needed for me). Note that if you don't remove your tires, you still need to deflate
Here's a step by step in pictures:
I've put a piece of cardboard in the bottom to give it a little more structure.

The rear part of the frame is the biggest piece, Note the cranks are taped back only the chainstays and the derailleur is in a plastic bag and taped between the chainstays.

The chainstays go along one side of the frame, to give the greatest space in the center for the rims.

This rack (Tubus Cosmo) is nice, but the width at axle is a space killer.

Note the rack is tucked in so that its thickest part (at the axle) is back in the same corner as the axle of the frame. The rack (with rims, as we shall see) will determines the overall thickness of the packing in the case.

Here's the front part of the frame

Tuck this one under the frame, but make sure you don't make the rack raise up!

The fork and my saddle bag:

The saddle bag gets tossed in the corner,

And the fork gets set along the edge of the frame. Note that the saddle bag here helps keep the brakes on the fork away from the edge of the case (but this probably isn't really important).

Butterfly handlebars are a pain. I tried to pack them with the stem on, but couldn't make it work.

Here the handlebars sit upright against the side that is opposite the fork.

Now we can throw in some miscellaneous pieces. Here's my seat post and the chain whip (which you need to remove the cassette in re-packing)

More miscellaneous pieces: seat, brake rotors, cassette, tools, tape, stem, etc. This is the time to throw in all the extra junk.

Once this stuff is in, it's starting to look full.

Next a tire...

... and a rim (start with the rear)

Here the spindle for the cassette is down, so it is inside the rack below.

Another tire and the fenders. Note that the stays for the fenders were removed and are part of the miscellaneous stuff above.

Here's the additional tire and fenders

And we add the final rim on top.

Then a layer of cardboard.

It all looks really nice - but be warned its a struggle getting it zipped! This doesn't mean that you've necessarily overpacked. When you put in the plastic side protectors and hook the up with velcro, then the zipping (even when empty) requires you to stretch the fabric. It's a good thing it has 8 extra buckles around to hold it together in case of zipper failure.

Basic bike and tools above came in at 48 lbs (which is under the limit of most airlines). I wanted to add my panniers stuffed in some of the blank space, but it put me right on the line and I don't want the extra weight charge.
Handlebars, stem, and headset
This is an empty post to remind me that I need to post something about handlebars, stem, and headset
 I got these off Amazon for $16, with the order coming from Niagara Cycle Works. I tried to order direct from them, but their shipping costs were higher than Amazon. There was a bit of a kerfuffle - the sent me the wrong handlebars. I called Niagara and gave them the part number I received and they sent out the correct item. They told me to keep the first set of bars they sent me (I think return shipping and re-stocking costs were more than the straight bar wholesale price.
By the way, don't expect things quickly from Niagara Cycle Works. Their order fulfillment is rather slow - particularly when compared to PricePoint or Jet.com. Funny story - I actually got stuff from Chain Reaction Cycles (in UK) faster than I got from Niagara. Both orders were over $200 and free shipping, but the Niagara order sat in their office for 8 days before they actually shipped it.
The handlebars I'm using are XLC Touring Multifunction-Bail HB-C05 bars...

By the way, don't expect things quickly from Niagara Cycle Works. Their order fulfillment is rather slow - particularly when compared to PricePoint or Jet.com. Funny story - I actually got stuff from Chain Reaction Cycles (in UK) faster than I got from Niagara. Both orders were over $200 and free shipping, but the Niagara order sat in their office for 8 days before they actually shipped it.
Brakes
I read a lot of stuff on disc brakes. Lots of opinion an anecdotes out there, but no a lot of hard data. I didn't want to deal with hydraulic brakes - simply too much mess to consider Anyway, I decided to go with the Avid BB7, which has been (sort of) the standard touring bike disc brake (according to various blogs). It's common enough that there shouldn't be problems getting parts.
Drive Train
I've decided to go with a 1x11 drive train using the Shimano XT 8000 series. I didn't want the trigger shifters that come with the drive sets, so I'm ordering stuff by the piece.
For the cassette, I wanted to have the biggest possible set of gears, which is the Shimano Deore XT CS-M8000 with an 11-42 range. Best deal I found was $95 at Backcountry. There were a couple place with slightly lower list prices, but with higher shipping costs.
The problem with going with something like an 11-42 cassette is that you can't be sure that a different manufacturer's derailleur will work. So I got the Shimano XT RD-M8000 rear derailleur with a GS Cage (in black) for $78 from Jenson USA.
Shimano Deore XT M8000 1x11 crank $104 from BikeBling. I've ordered the 165 mm crank - after reading some stuff at Bike Dynamics, I realized that I've been on stomping on too large of a crank for the past decade. Note that unlike most cranksets that you find online, the M8000 isn't sold with a chainring - so it's only sort of a crankset. Also, because of the asymmetry in the bolt holes (supposedly to optimize the loading) you MUST use a Shimano SM-CRM80 chainring!


To figure out what chainring I wanted, I went to Sheldon Brown's Gear Calculator and ran some numbers. Below is a table of the bike speed (mph) for 26 inch wheels at the rear cassette gears (1st column) for the 30/32/34 teeth chainring options when pedaling at 90 RPM.
I've decided to go with the 34T, because this will keep me in the middle of the cassette when touring at 10 - 12 mph. The best deal I found on this chainring was with JensonUSA - the 34T chainring was $50. Not cheap - but once you decide to go with a 1x11 system you lose a lot of flexibility in the components. You can mix the SRAM 1x11 with the Shimano, but there is some noise on the interwebs about issues with chainlines. Not sure that it really matters, but sticking with Shimano (or SRAM) seems reasonable. They both have similar prices for what appears to be the equivalent XT quality.
For future reference, here's how the drive train speed varies with 34T chainring at different RPM
I completed the drive train with bar end shifters. I didn't want the 11 speed trigger shifters from the Deore XT line, so I ordered the 2 x 11 speed Shimano Dura-Ace SL-BSR1 bar end shifters - this was $93 from Jenson USA, so kind of pricey as it comes with both the 11 speed cassette shifter and a 2-speed front derailleur shifter. I figured I didn't need the latter (wrong!). Ordering these Shimano bar end shifters was a major mistake. After two days of mucking about (and thinking that I was just incompetent), I discovered that the 11 speed Dura-Ace (road) drive train has a derailleur that doesn't match the pull length for the shift points of the 11-42 on the Deore XT line. You would think that indexed shift pull is an indexed shift pull, but noooooooooo. Rather than order the correct trigger shifters, I went to work with a bench grinder and a Dremel hand grinder on the 2-speed front derailleur bar end shifter. I turned it into a simple friction shifter with sufficient travel to cover the full range of the 11-42 cassette. It actually shifts quite smoothly, and to date (April 23, 2016). I'm not missing the indexing. But I could have saved a lot of money if I'd just bought a cheap bar-end friction shifter.
For the cassette, I wanted to have the biggest possible set of gears, which is the Shimano Deore XT CS-M8000 with an 11-42 range. Best deal I found was $95 at Backcountry. There were a couple place with slightly lower list prices, but with higher shipping costs.
The problem with going with something like an 11-42 cassette is that you can't be sure that a different manufacturer's derailleur will work. So I got the Shimano XT RD-M8000 rear derailleur with a GS Cage (in black) for $78 from Jenson USA.
Shimano Deore XT M8000 1x11 crank $104 from BikeBling. I've ordered the 165 mm crank - after reading some stuff at Bike Dynamics, I realized that I've been on stomping on too large of a crank for the past decade. Note that unlike most cranksets that you find online, the M8000 isn't sold with a chainring - so it's only sort of a crankset. Also, because of the asymmetry in the bolt holes (supposedly to optimize the loading) you MUST use a Shimano SM-CRM80 chainring!


To figure out what chainring I wanted, I went to Sheldon Brown's Gear Calculator and ran some numbers. Below is a table of the bike speed (mph) for 26 inch wheels at the rear cassette gears (1st column) for the 30/32/34 teeth chainring options when pedaling at 90 RPM.
| 30 | 32 | 34 | |
| 11 | 19 | 20.3 | 21.5 |
| 13 | 16.1 | 17.1 | 18.2 |
| 15 | 13.9 | 14.9 | 15.8 |
| 17 | 12.3 | 13.1 | 13.9 |
| 19 | 11 | 11.7 | 12.5 |
| 21 | 9.9 | 10.6 | 11.3 |
| 24 | 8.7 | 9.3 | 9.9 |
| 28 | 7.5 | 8 | 8.5 |
| 32 | 6.5 | 7 | 7.4 |
| 37 | 5.6 | 6 | 6.4 |
| 42 | 5 | 5.3 | 5.6 |
I've decided to go with the 34T, because this will keep me in the middle of the cassette when touring at 10 - 12 mph. The best deal I found on this chainring was with JensonUSA - the 34T chainring was $50. Not cheap - but once you decide to go with a 1x11 system you lose a lot of flexibility in the components. You can mix the SRAM 1x11 with the Shimano, but there is some noise on the interwebs about issues with chainlines. Not sure that it really matters, but sticking with Shimano (or SRAM) seems reasonable. They both have similar prices for what appears to be the equivalent XT quality.
For future reference, here's how the drive train speed varies with 34T chainring at different RPM
|
I completed the drive train with bar end shifters. I didn't want the 11 speed trigger shifters from the Deore XT line, so I ordered the 2 x 11 speed Shimano Dura-Ace SL-BSR1 bar end shifters - this was $93 from Jenson USA, so kind of pricey as it comes with both the 11 speed cassette shifter and a 2-speed front derailleur shifter. I figured I didn't need the latter (wrong!). Ordering these Shimano bar end shifters was a major mistake. After two days of mucking about (and thinking that I was just incompetent), I discovered that the 11 speed Dura-Ace (road) drive train has a derailleur that doesn't match the pull length for the shift points of the 11-42 on the Deore XT line. You would think that indexed shift pull is an indexed shift pull, but noooooooooo. Rather than order the correct trigger shifters, I went to work with a bench grinder and a Dremel hand grinder on the 2-speed front derailleur bar end shifter. I turned it into a simple friction shifter with sufficient travel to cover the full range of the 11-42 cassette. It actually shifts quite smoothly, and to date (April 23, 2016). I'm not missing the indexing. But I could have saved a lot of money if I'd just bought a cheap bar-end friction shifter.
Subscribe to:
Posts (Atom)