I bought 4 lengths of pipe insulation foam (for 1" pipe) and used that to wrap everything.
Key breakdown items:
-- disc brake rotors must be removed from wheels
-- removing the cassette can make it easier to fit (necessary in my case)
-- butterfly-style handle bars have to be removed from the stem
-- seat removed from seat post
-- one crank needs to be removed and turned to face the same direction, then taped with the other crank along the frame chainstay
-- rear derailleur must be removed
-- tires removed from rims (maybe not for every bike, but needed for me). Note that if you don't remove your tires, you still need to deflate
Here's a step by step in pictures:
I've put a piece of cardboard in the bottom to give it a little more structure.
The rear part of the frame is the biggest piece, Note the cranks are taped back only the chainstays and the derailleur is in a plastic bag and taped between the chainstays.
The chainstays go along one side of the frame, to give the greatest space in the center for the rims.
This rack (Tubus Cosmo) is nice, but the width at axle is a space killer.
Note the rack is tucked in so that its thickest part (at the axle) is back in the same corner as the axle of the frame. The rack (with rims, as we shall see) will determines the overall thickness of the packing in the case.
Here's the front part of the frame
Tuck this one under the frame, but make sure you don't make the rack raise up!
The fork and my saddle bag:
The saddle bag gets tossed in the corner,
And the fork gets set along the edge of the frame. Note that the saddle bag here helps keep the brakes on the fork away from the edge of the case (but this probably isn't really important).
Butterfly handlebars are a pain. I tried to pack them with the stem on, but couldn't make it work.
Here the handlebars sit upright against the side that is opposite the fork.
Now we can throw in some miscellaneous pieces. Here's my seat post and the chain whip (which you need to remove the cassette in re-packing)
More miscellaneous pieces: seat, brake rotors, cassette, tools, tape, stem, etc. This is the time to throw in all the extra junk.
Once this stuff is in, it's starting to look full.
Next a tire...
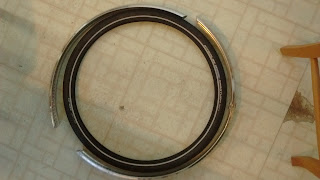
... and a rim (start with the rear)
Here the spindle for the cassette is down, so it is inside the rack below.
Another tire and the fenders. Note that the stays for the fenders were removed and are part of the miscellaneous stuff above.
Here's the additional tire and fenders
And we add the final rim on top.
Then a layer of cardboard.
It all looks really nice - but be warned its a struggle getting it zipped! This doesn't mean that you've necessarily overpacked. When you put in the plastic side protectors and hook the up with velcro, then the zipping (even when empty) requires you to stretch the fabric. It's a good thing it has 8 extra buckles around to hold it together in case of zipper failure.
Basic bike and tools above came in at 48 lbs (which is under the limit of most airlines). I wanted to add my panniers stuffed in some of the blank space, but it put me right on the line and I don't want the extra weight charge.


No comments:
Post a Comment